First described by Jackson et al. in 1958 and later popularized by Coventry, high tibial osteotomy (HTO) is a surgical procedure used to treat varus gonarthrosis (medial compartment knee arthritis). The technique has evolved from a lateral closing wedge to a medial opening wedge approach. Both methods are considered effective joint-preserving alternatives to partial or total knee replacement, particularly for younger, active patients.
Valgus-producing osteotomies, designed to offload the medial compartment, are typically performed using an HTO (either a medial opening wedge or a lateral closing wedge). Conversely, varus-producing osteotomies that offload the lateral compartment are generally done with a distal femoral osteotomy (DFO) (medial opening or lateral closing wedge) or a lateral opening wedge HTO.
Beyond treating arthritis, osteotomies can also address ligament instability in the presence of malalignment. Realigning the coronal plane can protect ligament reconstructions. Furthermore, altering the tibial slope in the sagittal plane can help manage insufficiency of the posterior cruciate ligament (PCL) or anterior cruciate ligament (ACL). Corrections to the tibial slope can be achieved through a direct anterior wedge osteotomy or a medial or lateral biplanar wedge osteotomy, which allows for simultaneous correction of both coronal and sagittal alignment.
The patient is positioned supine on a radiolucent operating table. A tourniquet is applied to the upper thigh for intraoperative hemostasis. A sterile positioning bump can be placed under the knee and leg for optimal fluoroscopic imaging during the osteotomy. The same bump can be placed under the heel to achieve full knee extension before final fixation. If a knee arthroscopy is indicated, the standard setup can be easily integrated into the osteotomy positioning.
A successful HTO begins with a thorough preoperative plan, including calculating the desired correction in both the coronal and sagittal planes.
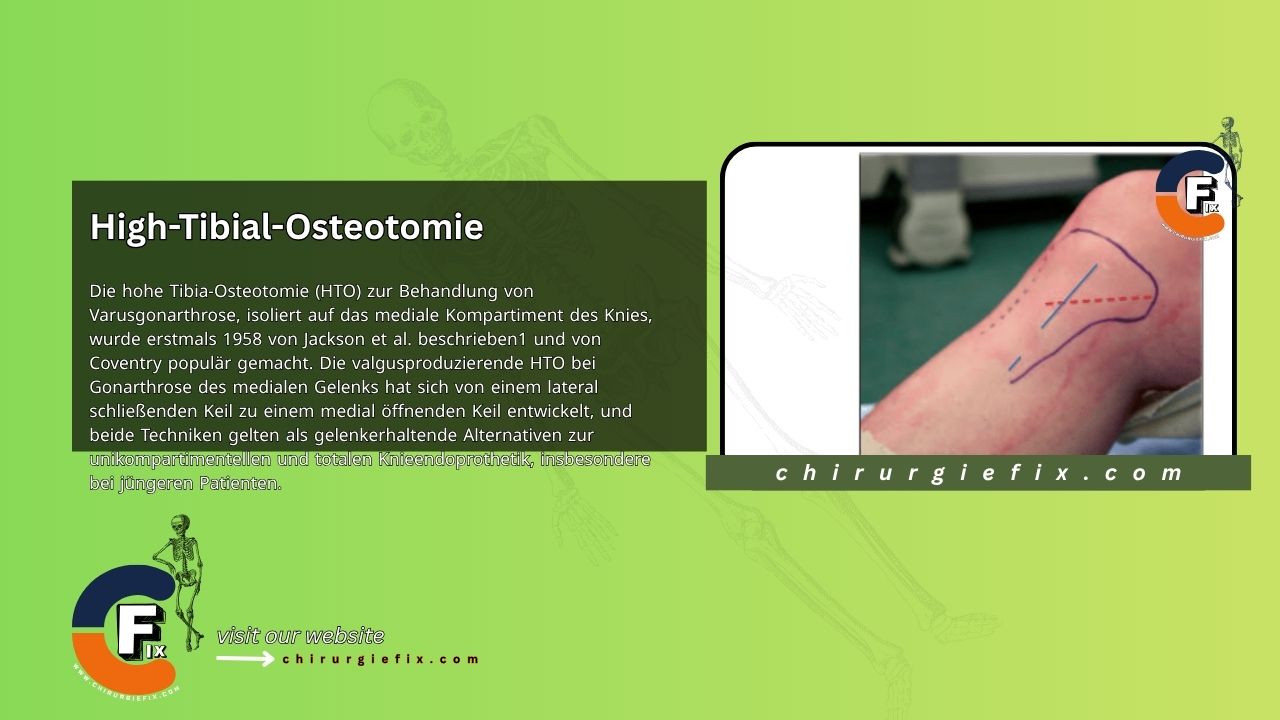
The surgical approach for a proximal medial opening wedge HTO should consider potential future surgeries. For this reason, a medial longitudinal incision midway between the tibial tubercle and the posteromedial border of the tibia is preferred.
After dissecting through skin and subcutaneous tissue, the first fascial layer is exposed using blunt dissection with a surgical sponge. The sartorius fascia is then incised directly over and in line with the gracilis tendon, releasing the pes anserinus 1 cm from its tibial attachment. This provides excellent exposure of the MCL’s tibial fixation.
Using electrocautery, the medial collateral ligament (MCL) is elevated from its fascial attachment (popliteus) for 3 to 5 cm, working from the metaphyseal flare of the tibia behind the MCL. A Cobb or periosteal elevator can gently lift the soft tissue on the back of the tibia. During this step, it is crucial to keep the instrument directed onto the posterior tibial cortex.
Next, a blunt-tipped Hohmann retractor is placed over the tibia, palpating the bone at the tip of the instrument as it is inserted. This instrument aligns directly with the intended osteotomy plane. The tibial tubercle and the medial border of the patellar tendon are then identified in the proximal part of the wound. The fascia is opened longitudinally, medial to the tendon, to allow for the insertion of a blunt retractor (Bent Lane or Hohmann) beneath the tendon. A small 5 mm release from the medial side of the tendon’s attachment to the tubercle improves visualization.
The C-arm is then brought into the field to guide the placement of a break-off pin at the upper border of the intended osteotomy site. The tibial width is measured using the calibrated pin. A wide osteotome is used to plan the cut, ensuring it passes just above the tibial tubercle. In the sagittal plane, the cut can follow the natural tibial slope; angling the cut by approximately 10 degrees provides more proximal bone for subsequent screw fixation.
Once the cut plane is selected, the osteotome is used as a guide, and the cut line is marked with electrocautery. The MCL is not elevated but is instead transected horizontally within the osteotomy line; if preferred, the surgeon can elevate the MCL, allowing it to fall back over the osteotomy site at the end of the procedure. A small oscillating saw blade (45 mm long) is chosen, and the cut is made perfectly in line with and below the guide pin.
Pay careful attention to the cut plane, especially anterior to the pin, to avoid extending the cut too proximally toward the joint. Once the initial saw cut is made, thin osteotomes can be used. A 10 mm thick bone bridge is preserved on the lateral side, with each step confirmed using the C-arm. For safety, retractors should remain in the same plane as the saw or osteotome while cutting.
Once the surgeon feels the desired cut is complete, a wide, firm osteotome is inserted, and the mobility of the osteotomy is assessed by gently levering the instrument. If there is minimal movement, the posterior cortex typically needs to be cut a bit further.
To open the osteotomy, stacked osteotomes or wedges are used to gradually open the site to the desired gap. The opening at the posteromedial aspect of the osteotomy is measured. To maintain a neutral slope, avoid placing a wedge too anteriorly, as this will open the front and increase the slope (this may be desirable for PCL insufficiency but not for ACL insufficiency or medial arthritis).
It is important to try and maintain the integrity of the lateral bone hinge to prevent translation and maintain stability. The tip of the osteotomy on the lateral side should always be closer to the lateral cortex than to the lateral joint line, which helps avoid intra-articular fractures.
Once the osteotomy is complete and held open at the desired width with a wedge or laminar spreader, hardware can be applied to maintain the correction.
A locking plate is preferred to provide axial and rotational stability during the consolidation phase. The plate is placed with spacer screws on the fascial layer to keep the plate slightly off the bone. Using the C-arm to confirm safe positioning, typically 4 locking screws can be placed both proximal and distal to the osteotomy with the correct plate position.
Check the lateral fluoroscopic view to ensure the screws do not protrude beyond the posterior cortex. Once satisfied with the fixation, the surgeon may consider filling the defect with bone graft or a bone graft substitute. For smaller corrections, no graft is used. Wound closure is performed over a suction drain, which is typically removed the next day. For added comfort, an icing sleeve and/or a hinged knee brace may be used.
Most patients are kept overnight, though outpatient surgery can be considered for healthy, younger patients with good perioperative pain management. Prophylactic antibiotics and anticoagulation may be administered at the surgeon’s discretion. The brace is locked at 0 degrees overnight and unlocked the next morning after a dressing change and drain removal. The brace is set to allow 0 to 90 degrees of motion.
For the first 2 weeks, the patient uses crutches and is toe-touch weight-bearing. The patient is re-evaluated for wound healing at this stage and can then progress to full weight-bearing on the operated leg as tolerated, provided there are no signs of fixation complications on x-rays. It generally takes another 3 to 4 weeks for the patient to walk without assistive devices. The brace is removed for therapy, and full range of motion exercises, along with isometric quadriceps and hamstring exercises, are recommended.
Using a stationary bike without resistance and water therapy are permitted once wound healing is satisfactory. The brace is discontinued after 6 weeks, and progressive closed-chain strengthening is started. Patients are routinely followed up at 2, 6, 12, 26, and 52 weeks. It is not uncommon for the osteotomy to take a full 6 months for union and 1 year for remodeling.